
Measure an Existing Hinge for a Replacement That Actually Fits
Open a butt hinge flat. Measure height along the pin and width across both leaves, then match the corner radius.
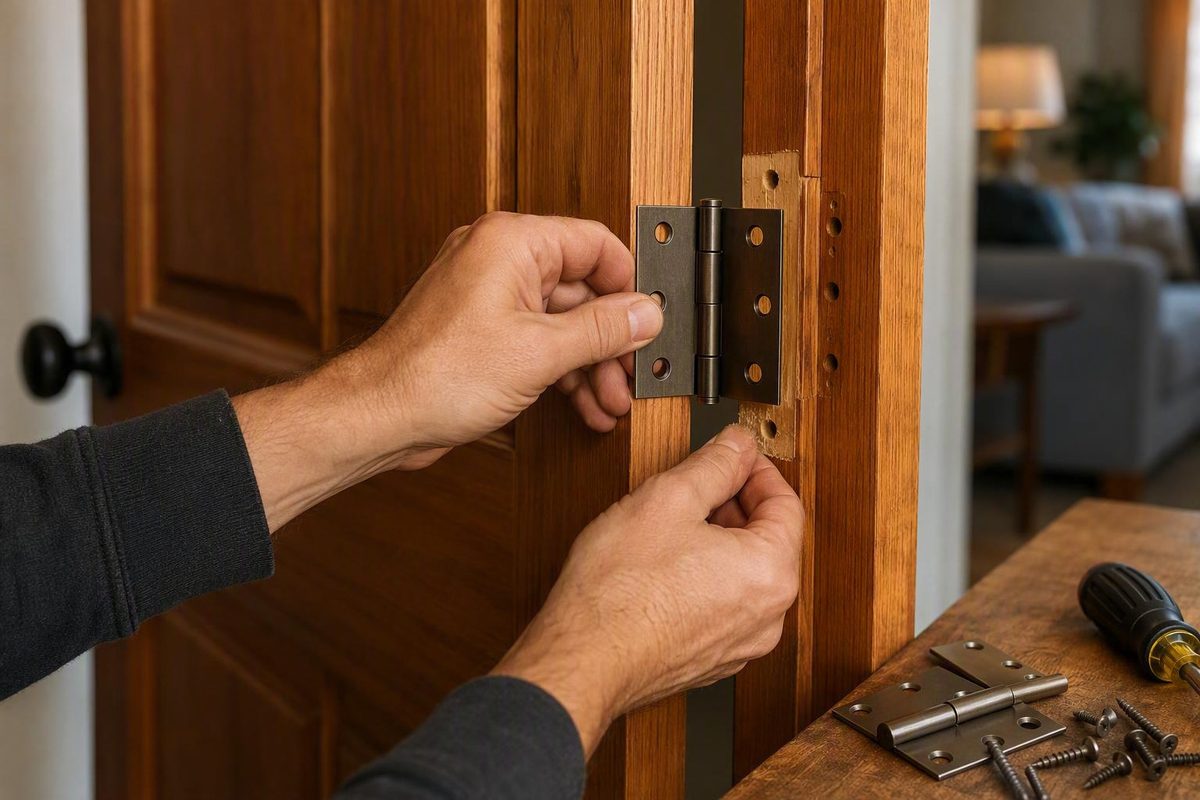
Replacing a residential door hinge is not simply a matter of matching the size printed on the package.
For the best chance of finding a drop-in replacement, treat the old hinge as a complete pattern. Measure it fully open, document how it fits the door and jamb, and compare the result with a dimensioned product drawing rather than relying on a product name or photograph.
The quick answer: what to measure on a door hinge
This procedure applies primarily to a conventional butt hinge: two flat leaves joined by interlocking knuckles and a pin. If that describes your hinge, record:
- Hinge height
- Overall open width across both leaves
- Corner profile: square or rounded
- Corner radius, if rounded
- Leaf thickness
- Number and arrangement of screw holes
- Hinge type and bearing style
- Pin style: removable, fixed, or specialized
- Finish and apparent material
- Mortise height, width, depth, and corner shape
- Any manufacturer markings or distinctive features
When practical, remove one hinge, open it fully, and place it flat on a stable surface. This exposes its complete footprint and prevents you from confusing one visible leaf with the width of the whole hinge. Replacement-hinge guidance describes the basic size as the open hinge measured from side to side and top to bottom (Direct Door Hardware).
Keep the orientation clear:
- Height runs parallel to the hinge pin.
- Overall open width runs perpendicular to the pin, from the outside edge of one leaf to the outside edge of the other.
Do not measure one leaf and call that the hinge width. Individual leaf width and overall open width are different dimensions. Likewise, do not assume that a hinge described as “3-1/2 inch” measures 3-1/2 inches in both directions. Equal height and open width are common, but they are not universal.
Identify the hinge type before following the rest of this guide. Concealed, pivot, spring, continuous, unequal-leaf, and other specialty hinges require measurements and selection criteria specific to their design and manufacturer. The standard butt-hinge procedure should not be applied to them unchanged.
Prepare the hinge and identify its parts
Removing one hinge normally gives you the clearest measurements, but removal is not appropriate in every situation. If the door is heavy, unstable, unusually large, specialty-built, or difficult to support, measure the hinge in place or ask a qualified hardware professional to identify it. Door size, weight, material, location, function, and existing hinge count all affect hardware selection, and specialty or uncertain applications may require professional or manufacturer-specific guidance (Today’s Design House).
For a typical measurement job, gather:
- A tape measure or steel rule
- Calipers for leaf thickness, if available
- The correct screwdriver
- Paper and a sharp pencil
- A camera or phone
- A small container for screws
- A radius gauge or verified radius template, if available
A steel rule is usually easier to align with a hinge edge than a flexible tape.
Know these basic parts before measuring:
- Leaves: The two flat plates fastened to the door and jamb.
- Knuckles: The rolled portions of the leaves that interlock.
- Barrel: The assembled cylindrical section formed by the knuckles.
- Pin: The rod passing through the knuckles.
- Outside leaf edge: The edge opposite the barrel.
- Screw holes: The countersunk openings used to fasten the hinge.
The barrel can be shorter than the leaves. Do not substitute barrel length for hinge height. Hinge height is normally measured from the top outside edge of a leaf to its bottom outside edge.
If paint bridges the hinge to the door or jamb, score or free the painted edge carefully rather than levering hard against the wood. Stop if removal begins to tear away the surrounding finish or disturb the door.
Once the hinge is removed:
- Keep it as a physical shopping reference.
- Store its screws in a labeled container.
- Trace the fully opened hinge on paper.
- Mark the center of every screw hole.
- Note which leaf was attached to the door.
- Photograph the hinge before cleaning or altering it.
For online shopping, take clear photographs of:
- The entire hinge fully open
- The screw pattern, viewed straight-on
- The top and bottom corners
- A clean leaf edge
- Both ends of the pin
- The knuckle arrangement
- Any stamped name, number, or symbol
- The empty mortise, if safely accessible
Place a ruler in at least one photograph for scale, but do not use the photograph as your only dimensional record.
Measure hinge height and overall open width
Lay the hinge fully open on a flat surface. Both leaves should rest in the same plane, with no screw heads, debris, curled paper, or paint flakes underneath them.
1. Measure the height
Place the rule parallel to the pin. Measure from the top outside edge of a leaf to its bottom outside edge.
Use the full leaf height—not the distance between screw holes and not just the visible barrel. If rounded corners make the endpoints difficult to judge, align the rule with the straight top and bottom limits of the leaf.
Record the actual measurement before rounding. If it is close to a familiar fraction, confirm it with a steel rule.
2. Measure the overall open width
Turn the rule so it is perpendicular to the pin. Measure from the outside edge of one leaf to the outside edge of the other, across the fully opened hinge.
This is the overall open width, also called the full leaf span. It is different from individual leaf width, which is measured from the pin centerline to the outside edge of one leaf (Essentra Components).
A common error is to measure only the leaf visible on the edge of an installed door. That number is not the overall open width.
3. Measure individual leaves when relevant
For an ordinary equal-leaf butt hinge, the overall open width may be enough for initial identification. Measuring each leaf separately can still reveal an unequal-leaf design or an incorrect assumption about the centerline.
For each leaf, measure from the centerline of the pin to the outside edge. If the leaves differ, record both dimensions and identify which leaf was attached to the door.
4. Label the size clearly
Write the dimensions in an unambiguous format:
3-1/2-inch height × 3-1/2-inch overall open width
Include the words height and overall open width. Sellers do not always list dimensions in the same order, so compare your labels with the product drawing before ordering.
Many residential butt hinges have matching height and open width, but equality is not a rule. Measure both dimensions rather than copying the first result into both fields.
Labeled measurement diagram
                 HINGE FULLY OPEN AND FLAT

      outside edge                           outside edge
           │                                      │
           ▼                                      ▼
   ┌──────────────┐                         ┌──────────────┐
   │              │       KNUCKLES          │              │
   │    LEAF A    ├───────╥─╥─╥────────────┤    LEAF B    │
   │              │       ║ │ ║            │              │
   └──────────────┘       ╨─╨─╨            └──────────────┘
                           ┆
                           ┆ PIN CENTERLINE
                           ↕ PIN DIRECTION

   ↕ HEIGHT
   │ Top outside edge to bottom outside edge
   │ Measured parallel to the pin
   ↕

   ◄──────────────── OVERALL OPEN WIDTH ────────────────►
   Outside edge of Leaf A to outside edge of Leaf B
   Measured perpendicular to the pin

   outside edge ◄──── LEAF A WIDTH ────► pin centerline

   BARREL LENGTH
   Top of the assembled barrel to bottom of the barrel.
   It may differ from the full leaf height.
The diagram is schematic and not to scale. Its purpose is to show where each dimension begins and ends.
Identify the corner radius and measure leaf thickness
Matching height and open width is only the first stage. The replacement must also fit the shape and depth of the existing mortise.
Identify the corner profile
Examine the outside corners of each leaf:
- A square corner forms a 90-degree angle.
- A radius corner follows a rounded arc.
Square, 1/4-inch-radius, and 5/8-inch-radius corners are common residential profiles, although other shapes can exist. For a quick approximation, a U.S. dime can be compared with a 1/4-inch radius and a U.S. quarter with a 5/8-inch radius (Access Residential Hardware).
The coin method is approximate. Paint, damage, viewing angle, or a nonstandard profile can create a misleading match. Use a radius gauge or a verified manufacturer template when accuracy matters.
Do not confuse the radius with the length of the visible curved edge. Radius is the distance from the theoretical center of the arc to its perimeter.
Conceptual corner comparison
SQUARE CORNER          SMALLER RADIUS         LARGER RADIUS

┌────────────          ╭────────────          ╭────────────
│                      │                      │
│  90° corner          │  tighter curve       │  broader curve
│                      │                      │
This sketch is conceptual, not a printable true-scale template. Markdown, screen scaling, browser zoom, and printer settings cannot preserve a dependable physical size.
For an accurate comparison:
- Use a radius gauge or a dimensionally verified manufacturer template.
- If printing a template, select 100% or actual size.
- Disable fit to page and other scaling options.
- Check its calibration mark with a physical ruler.
- Do not use it unless the calibration mark measures correctly.
- Place the hinge directly over the profile rather than judging from memory.
If paint obscures the leaf, compare an undamaged corner or inspect the shape of the empty mortise.
Measure leaf thickness
Use calipers on a clean, accessible outside edge of the flat leaf. Keep the caliper jaws square to the metal and close them gently.
Avoid measuring:
- Over a paint ridge
- Across a burr or damaged edge
- At a screw hole
- Across an embossed marking
- On the rolled knuckle
- Where the metal has been bent or distorted
If both leaves are accessible, check both. Record the result in inches or millimeters with enough precision to compare it with the manufacturer’s drawing.
Leaf thickness matters because a butt hinge normally sits in a shallow recess called a mortise. The mortise depth should correspond to the leaf thickness so the installed leaf sits flush. A thicker replacement may stand proud; a thinner one may sit below the surrounding surface. Installation guidance similarly calls for the mortise to match the hinge leaf in size and depth (Rocky Mountain Hardware).
Before removing wood or adding packing material, compare the old and new leaves directly. Also inspect the mortise for paint, debris, compressed wood, or previous alterations.
Match the screw holes, mortise, and hinge configuration
Hinges with the same nominal size do not necessarily use the same screw-hole pattern. Count the holes in each leaf and record their arrangement.
Pattern descriptions may include:
- Arch
- Zigzag
- Template
- Staggered
- Symmetrical
These terms can help with searching, but they are not a substitute for measurements. Sellers may use pattern names differently.
For a dependable record, use one or more of these methods:
- Trace the old hinge. Draw around it while fully open and mark every hole center.
- Measure hole coordinates. Measure each center from the same top and outside reference edges.
- Take a straight-on photograph. Include a ruler and keep the camera parallel to the leaf.
- Overlay the hinges. Place the old hinge directly over the proposed replacement.
Use consistent reference edges. For example, record each hole as:
Distance down from top edge × distance inward from outside leaf edge
Avoid measuring only from one hole to the next.
Next, compare the hinge with the existing mortise. Check:
- Mortise height
- Mortise width
- Mortise depth
- Corner profile
- Screw-hole locations
- Condition of the door and jamb
- Whether the old leaf sat flush, proud, or recessed
Changing from a rounded-corner hinge to a square-corner hinge generally prevents the new leaf from seating in an unaltered mortise. Installing a rounded leaf in a square mortise can leave visible gaps. Neither is a true drop-in replacement.
Also record useful configuration details:
- Plain-bearing or bearing-assisted construction
- Removable or fixed pin
- Pin-head and tip shape
- Visible knuckle arrangement
- Equal or unequal leaves
- Apparent material and finish
- Decorative tips or finials
- Security features
- Manufacturer or model markings
Not every visible detail must match in every ordinary residential application. Pin construction, bearing style, unequal leaves, or security features may indicate that the hinge serves a function beyond fitting the recess.
Treat the old hinge as a complete system rather than a rectangle. Height and width alone cannot confirm that the screw holes will align, the leaf will sit flush, or the replacement will operate in the same way.
How to measure a hinge without removing it
If removal is impractical or the door cannot be kept stable, measure the hinge in place.
With the door in a stable position, record:
- Visible leaf height: Measure top to bottom, parallel to the pin.
- Visible door-leaf width: Measure from the estimated pin centerline to the visible outside edge.
- Visible jamb-leaf width: Record separately if accessible.
- Corner shape: Note whether the visible corners are square or rounded.
- Screw pattern: Count the visible holes and photograph them straight-on.
- Pin and knuckles: Photograph both pin ends and the barrel from the edge.
- Hinge count: Record how many hinges support the door.
- Mortise fit: Note whether each leaf appears flush, proud, or recessed.
Do not automatically add two visible leaf measurements and label the result the overall open width. Record the full open span only if the door position allows you to identify both outside leaf edges reliably.
Look for a paint line around the leaf. It may reveal the original mortise footprint or a corner profile hidden by the current hinge. If the leaf stands above or below the surrounding surface, note whether paint, debris, compressed wood, or damage appears responsible.
Take photographs from two viewpoints:
- Straight-on, showing the footprint, corners, and screw pattern
- From the edge, showing the barrel, pin ends, leaf position, and mortise relationship
Include a rule for scale and avoid wide-angle distortion. Photograph any manufacturer stamp and any label attached to the door or assembly.
Compare your observations with a dimensioned manufacturer drawing, not merely a product photograph. The drawing may identify open width, individual leaf width, thickness, hole locations, corner radius, and pin construction.
If identification remains uncertain, give a hardware supplier the measurements, tracing, and photographs. Do not guess when the door is heavy, unstable, specialty-built, unusually wide, or otherwise safety-critical.
Sizing hinges for a new door is a different calculation
Replacing an existing hinge and selecting hinges for a new door are different tasks.
For a replacement, the old hinge and mortise provide a physical specification. For a new installation, hardware must be selected for the door’s geometry, weight, construction, use, and required clearances.
Collect this information first:
- Door height
- Door width
- Door thickness
- Approximate weight
- Material and construction
- Hollow, solid, glazed, or metal construction
- Interior or exterior location
- Expected frequency of use
- Direction and extent of swing
- Planned hinge type
- Planned hinge count
- Backset
- Required frame, jamb, casing, or trim clearance
- Environmental exposure
- Door, frame, or assembly labels
- Manufacturer or warranty requirements
In this sizing context:
- Backset is the distance from the hinge edge to the door face.
- Clearance is the necessary gap between the open door and the frame or jamb.
One published estimate for minimum overall open width is:
Minimum open width = (door thickness − backset) × 2 + required clearance
This is an application-dependent estimate, not a universal engineering rule. The same sizing guidance presents roughly one hinge per 30 inches of door height only as general orientation and advises considering door size, suspended weight, construction, and expected traffic (Essentra Components).
Use the formula to identify possible geometry, then verify the proposed hardware against the hinge manufacturer’s drawings and load information. Moving to the next larger nominal size does not, by itself, prove adequate capacity.
As familiar residential reference points, many standard interior doors use 3-1/2-inch hinges, while exterior doors may use 4-inch hinges. These are general conventions rather than universal requirements; the door’s weight, dimensions, construction, function, and existing preparation remain decisive (Today’s Design House).
A heavier, wider, taller, solid, exterior, or frequently used door may require:
- A larger hinge
- Thicker or stronger leaves
- A higher product load rating
- Ball-bearing or other bearing-assisted construction
- Additional hinges
- Different fasteners or reinforcement
- Material suitable for the environment
Ball-bearing hinges reduce friction and are commonly considered for heavy or frequently operated doors, but their suitability still depends on the particular product and opening (Yale).
Manufacturer load tables, door instructions, and assembly documentation take precedence over residential rules of thumb. Seek manufacturer-specific guidance or qualified assistance for:
- Wide or oversized doors
- Heavy solid or glazed doors
- High-traffic openings
- Fire-rated assemblies
- Security openings
- Commercial or institutional doors
- Doors exposed to unusual corrosion or weather
- Spring, pivot, concealed, continuous, or specialty systems
This guide does not provide code-compliance, fire-door, security, or structural engineering specifications.
Replacement worksheet and fit troubleshooting
Use this worksheet before visiting a store or ordering online.
Hinge measurement worksheet
EXISTING HINGE

Hinge type: ______________________________________________

Height, parallel to pin: _________________________________

Overall open width across both leaves: ___________________

Leaf A width, if relevant: _______________________________

Leaf B width, if relevant: _______________________________

Leaf thickness: __________________________________________

Corner profile:
[ ] Square
[ ] Rounded
[ ] Other/uncertain

Measured or identified radius: ___________________________

Number of holes in Leaf A: _______________________________

Number of holes in Leaf B: _______________________________

Hole pattern description: ________________________________

Hole-center locations from top and outside reference edges:
__________________________________________________________
__________________________________________________________

Pin style:
[ ] Removable
[ ] Fixed
[ ] Uncertain
[ ] Other: _______________________________________________

Bearing style:
[ ] Plain
[ ] Ball bearing
[ ] Other
[ ] Uncertain

Knuckle arrangement or distinctive features:
__________________________________________________________

Material or finish: ______________________________________

Manufacturer markings or model information:
__________________________________________________________


EXISTING MORTISE

Mortise height: __________________________________________

Mortise width: ___________________________________________

Mortise depth: ___________________________________________

Mortise corner profile: __________________________________

Old leaf position:
[ ] Flush
[ ] Proud
[ ] Recessed

Wood, frame, paint, or screw-hole damage:
__________________________________________________________


DOOR DETAILS

Door height: _____________________________________________

Door width: ______________________________________________

Door thickness: __________________________________________

Approximate weight, if known: _____________________________

Material and construction: _______________________________

Location:
[ ] Interior
[ ] Exterior
[ ] Other

Number of hinges: ________________________________________

Special labels or manufacturer instructions:
__________________________________________________________
Photo checklist
Take and retain photographs of:
- [ ] Hinge fully open
- [ ] Entire screw pattern, straight-on
- [ ] Top corners
- [ ] Bottom corners
- [ ] Clean leaf edge
- [ ] Both pin ends
- [ ] Knuckle arrangement
- [ ] Empty mortise, if safely accessible
- [ ] Manufacturer markings
- [ ] Door or assembly label, if present
Worked sample record
The following values are fictional and are included only to demonstrate how a complete record can be written. They are not a specification for a particular door or product.
Existing hinge: Conventional equal-leaf butt hinge. Height: 3-1/2 inches. Overall open width: 3-1/2 inches. Leaf A width: 1-3/4 inches from pin centerline to outside edge. Leaf B width: 1-3/4 inches. Leaf thickness: 0.085 inch. Rounded corners with an identified 1/4-inch radius. Three countersunk holes in each leaf. Hole centers on both leaves are 1/2 inch, 1-3/4 inches, and 3 inches down from the top edge, with each center 9/16 inch inward from the outside edge. Removable pin, plain-bearing construction, and a satin-nickel-colored finish. Three hinges are installed on the door.
Existing mortise: 3-1/2 inches high, matching the leaf width, and approximately 0.085 inch deep. The corner profile follows the old leaf, and the hinge sits flush. No visible splitting is present, although paint partially fills one countersink. Straight-on photographs, edge photographs, and a paper tracing accompany the measurements.
A supplier can do far more with that record than with a description such as “standard interior hinge.”
If the new hinge sits proud
Compare the new leaf thickness with the old leaf and check the mortise depth. Look for:
- Paint under the leaf
- Debris in the mortise
- A burr on the replacement
- Compressed or raised wood
- Screw heads standing above their countersinks
Do not deepen the mortise until you have confirmed that the replacement hinge is otherwise correct. Removing wood to accommodate the wrong product can create a harder problem.
If the new hinge sits recessed
Check whether the replacement leaf is thinner than the original. Also inspect the recess for previous over-cutting or damage that the old hinge concealed.
Do not assume that tightening the screws will correct a recessed leaf.
If there are visible gaps at the corners
Compare the old and new corner profiles.
A rounded leaf in a square mortise leaves empty spaces at the corners. A square leaf will not seat fully in an unchanged rounded mortise. Check all outside corners because paint may hide the mismatch at one end.
If the screws do not align
Lay the old and new hinges directly over one another. Align the outside edges, then compare every hole center.
If the patterns differ, confirm that you have the correct product variation. Do not rely on names such as “arch” or “zigzag” when the physical hole locations disagree.
Avoid drilling new holes until you have established that:
- The replacement hinge is otherwise correct
- The new holes will not overlap damaged old holes
- The surrounding material is sound
- The proposed change is appropriate for the door
If the nominal size matches but the hinge binds
Check whether:
- The hinge opens fully and lies flat
- The leaves are equal or unequal
- The replacement is the same hinge type
- The barrel or knuckles interfere with the mortise
- Paint or debris is lifting a leaf
- The mortise is distorted
- Screw heads stand above the countersinks
- The leaves are installed in the correct orientation
- The door was already misaligned
- The new hinge differs in leaf thickness or bearing construction
Before enlarging a mortise, drilling new holes, or changing hinge type, verify the complete fit and the door’s requirements. Exchanging an incorrect hinge is easier to reverse than altering the door or jamb.
Final purchasing checklist
Bring or submit:
- [ ] Hinge height
- [ ] Overall open width
- [ ] Individual leaf widths, if relevant
- [ ] Leaf thickness
- [ ] Corner profile and radius
- [ ] Hole count and exact locations
- [ ] Mortise dimensions
- [ ] Hinge and pin type
- [ ] Required quantity
- [ ] Finish
- [ ] Bearing style, where relevant
- [ ] Old hinge or paper tracing
- [ ] Clear photographs
- [ ] Door dimensions and construction
- [ ] Manufacturer load information for demanding applications
Should a door hinge be measured open or closed?
Measure a conventional butt hinge fully open and flat. That position exposes the complete span across both leaves.
Measure height parallel to the pin, from the top outside edge to the bottom outside edge. Measure overall open width perpendicular to the pin, from one outside leaf edge to the other. A closed hinge does not expose that full width reliably.
Is door-hinge width the span across both open leaves or the width of one leaf?
For replacement sizing, overall open width is the span across both fully opened leaves, from outside edge to outside edge.
The width of one leaf is a separate dimension measured from the pin centerline to that leaf’s outside edge. Because sellers may use “hinge width” and “leaf width” differently, label your measurement and compare it with the product drawing.
How can I tell whether a hinge has a 1/4-inch or 5/8-inch corner radius?
First confirm that the corner is rounded rather than square. Then compare it with a radius gauge or a verified true-scale template.
As a rough check, a U.S. dime can approximate a 1/4-inch-radius corner and a U.S. quarter can approximate a 5/8-inch-radius corner. The comparison is not exact, particularly when the hinge is painted, worn, or damaged (Schlage).
Are 3-1/2-inch hinges for interior doors and 4-inch hinges for exterior doors standard?
They are common residential reference points, not mandatory sizes for every door. Many interior doors use 3-1/2-inch hinges, while exterior doors commonly use 4-inch hinges, but the correct choice also depends on door thickness, width, height, weight, construction, use, hinge count, and product capacity (Schlage).
For a straightforward replacement, copy the existing hinge and mortise. For a new door, follow the relevant door and hinge manufacturers’ specifications.
Why does a replacement hinge with the same height and width sometimes fail to fit?
Height and overall open width describe only the basic footprint. The replacement may still have:
- A different corner radius
- Thicker or thinner leaves
- Different screw-hole centers
- Unequal rather than equal leaves
- A different pin or knuckle arrangement
- A different hinge or bearing type
- A footprint that does not match the mortise depth or shape
The dependable rule is to open and measure the actual hinge rather than relying on the door type or an assumed standard size. Record the height, overall open width, corner profile, leaf thickness, screw-hole arrangement, mortise fit, and identifying photographs. For heavy, specialty, commercial, fire-rated, or otherwise uncertain doors, use the relevant manufacturer guidance or consult a qualified hardware professional.