
Offset Pivot Hinges: Match the Whole Hanging System
Understand how offset pivot hinges carry a door, what to match before ordering, and why alignment, floor anchorage and door preparation matter.
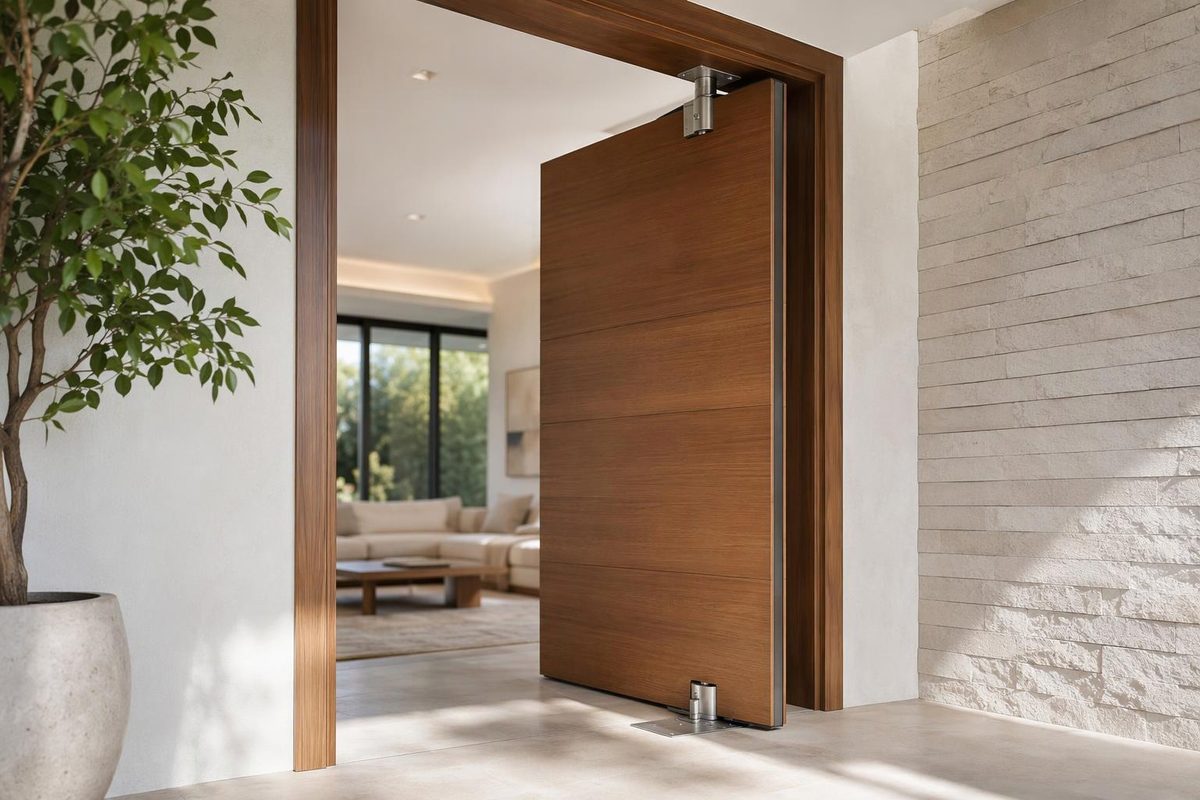
An offset pivot hinge hangs a door on an axis positioned outside its face, near the hanging—or heel—edge. For a replacement, identify the complete pivot system, not just the visible top fitting: record the manufacturer and model, offset, handing, bottom support and any intermediate pivots before choosing a finish.
The offset dimension is measured from the door face to the pivot centerline. Common Norton Rixson configurations are 3/4 inch (19 mm) and 1-1/2 inches (38 mm). The larger offset is intended to clear door cladding or frame trim; it is not automatically a stronger option. Norton Rixson’s selection guide explains both layouts.
How the pivot system works
In a floor-supported offset pivot set, the door’s weight passes through the bottom arm and pivot into the floor. The top pivot keeps the upper end on the same rotational axis. Bearings and bushings accommodate the vertical load and lateral forces; intermediate pivots help maintain alignment. This arrangement reduces the load carried by the frame compared with hanging the entire door from its side. Norton Rixson’s catalog describes that load path.
| Component | Function | Replacement check |
|---|---|---|
| Top pivot | Locates the upper end of the rotational axis | Offset, mounting preparation, pin dimensions and compatibility with the lower hardware |
| Bottom pivot and door arm | Support the door and establish its lower rotation point | Model, spindle, arm, anchorage, threshold and floor clearance |
| Intermediate pivot | Helps maintain alignment; load-bearing versions also support weight | Exact type, offset, quantity and position specified for the system |
| Door closer, if fitted | Controls closing rather than merely hanging the door | Compatibility with the pivot arrangement and required operation |
A plain pivot set does not self-close the door. A compatible closer supplies that function. A top pivot may also be used with a floor closer: Norton Rixson describes its 180 top pivot as a component for both offset pivot sets and floor closers. Buying that top fitting alone does not provide a complete hanging system.
If you are still deciding whether the hardware is a pivot, swing-clear hinge or wide-throw hinge, use the separate offset door hinge identification guide.
Where offset pivots are useful
Offset pivots are available for light-duty interior doors, heavier interior or exterior doors, and specialized lead-lined or high-traffic doors. Those are different product specifications—not capabilities shared by every offset pivot.
For example, Norton Rixson’s 117 is an interior-door set, while its 147 is specified for interior or exterior doors. Its L-series sets include designs for lead-lined, heavy and high-traffic doors. The manufacturer’s catalog distinguishes these applications.
For an existing butt-hinged door, treat conversion to pivots as a door-and-frame preparation project, not a hinge swap. The 147 installation requires top and bottom door mortises, header preparation, floor anchorage and a prepared heel edge. Existing side-hinge recesses do not establish that any of those requirements are met. The 147 installation instructions show the required work.
What must match before ordering
Record these details and compare them with the proposed model’s drawing:
- Door width, height, thickness and weight, including cladding or other added material. Check usage as well as weight.
- Handing. Use the manufacturer’s handing diagram. An individual top pivot can be non-handed even when the complete set is handed: the 180 top pivot supplied in the 117 set is one example.
- Both axis dimensions: face-to-centerline offset and heel-edge-to-centerline position. Do not use a generic offset dimension as a drilling layout.
- Preparation and reinforcement: mortise lengths, widths and depths; hole positions; mounting surfaces; and specified fasteners.
- Floor and threshold arrangement: surface-mounted or recessed bottom hardware, spindle height, undercut and adjustment provision.
- Intermediate pivots: required model and quantity. Do not assume they are included in the set.
The 117 product specification illustrates why these checks belong together. It lists door widths up to 42 inches (1,067 mm) and weights up to 300 lb at the standard 3/4-inch offset, subject to the appropriate intermediate pivots, but 150 lb for the 1-1/2-inch offset option. A larger offset can reduce capacity. For the 147, the catalog specifically requires an M19 intermediate pivot, sold separately; rated variants have their own requirements.
Fitting: alignment comes before adjustment
The essential fitting requirement is one straight vertical pivot axis. The top, bottom and any intermediate pivots must agree; matching finish and screw spacing cannot compensate for misalignment.
Before hanging or removing the door, know its weight and use suitable equipment to prevent it falling. The 147 instructions and template make that warning explicit. The following is a fitting overview for the 147 3/4-inch-offset floor-mounted set, not a substitute for those instructions or a universal cutting layout:
- Confirm handing and check that the pivot-side frame is straight and plumb.
- Locate and install the header portion of the top pivot using the specified template.
- Use a plumb line from the top pivot to locate the bottom spindle centerline, then verify it against the frame references on the template.
- Prepare the door mortises, holes and heel-edge bevel/radius. Coordinate bottom-arm mortise depth with the threshold and required floor clearance; prepare for the specified intermediate pivots using their template.
- Anchor the bottom floor portion securely and keep it level in both directions. Install the top pivot’s door portion and bottom arm, checking that their centerlines align with the bottom spindle.
- Hang the supported door, secure the top pin and its cap, tighten the bottom-arm locking screw, and complete the arm-cap and intermediate-pivot installation as instructed.
For that model, the instructions allow floor dragging to be corrected by raising the supported door and inserting 1/16-inch (1.6 mm) shims, after loosening the bottom-arm locking screw and before retightening it securely. Do not transfer that adjustment method to a different pivot system—or use height adjustment to conceal an alignment problem.
For fire-rated, egress, accessible or electrified openings, verify the complete assembly’s approved hardware and applicable local requirements before changing the pivot arrangement. A matching offset alone does not establish suitability.