
Identify and Measure the Offset Hinge Your Door Needs
Identify swing-clear, wide-throw and offset-pivot hinges, measure the clear opening and existing prep, and verify door compatibility before ordering.
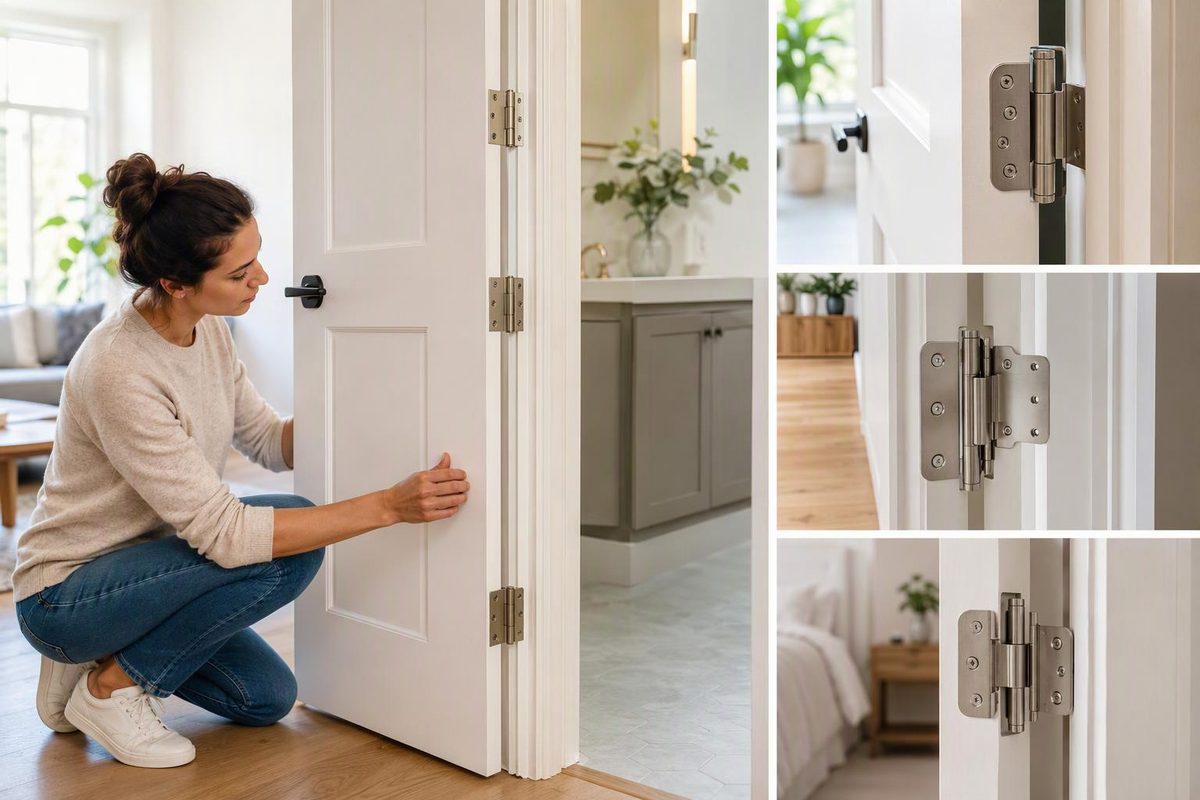
An offset hinge usually means a swing-clear hinge, whose bent or “cranked” leaves move the open door toward the hinge-side wall so the slab occupies less of the doorway. The name is also used for wide-throw hinges and offset pivots, which solve different problems. Identify the mechanism, measure the opening and existing preparation, and check the manufacturer’s geometry before ordering.
Select the hardware layout and the problem you need to solve; the result identifies the likely hinge family.
Offset Hinge Family Selector
Match the existing hardware layout to the job the hinge must perform.
Likely Family
Swing-clear or swing-away butt hingeBent or cranked leaves shift the open slab toward the hinge-side wall to preserve more clear opening.
Measure next: clear width at 90°, hinge height, leaf thickness, screw pattern, corners, door edge and the manufacturer’s stated clearance angle.
Source basis: Hager commercial-hinge guidance and ABH 0195 archived specifications cited in the article. Final dimensions and handing remain model-specific.
Three Hardware Families Share the Name
| Hardware | How to Recognize It | What It Does |
|---|---|---|
| Swing-clear or swing-away butt hinge | A visible pin with stepped, bent or cranked leaves; often mortised like a butt hinge | Moves the open door out of the clear opening |
| Wide-throw, projection or parliament hinge | Extra-wide leaves place the pin farther from the door edge | Lets the door swing past thick casing, a wall reveal or another obstruction |
| Offset pivot | Separate fittings at the top and bottom rather than several pins down the hinge edge | Carries the door on a pivot axis offset from its usual edge location |
These families are not interchangeable. A swing-clear hinge is intended to reduce how much of the doorway is occupied by the open slab. A wide-throw hinge moves the hinge axis outward so the door can clear an obstruction beside the opening.
Hager defines a wide-throw hinge as a full-mortise hinge whose open width exceeds its height. Its width calculation uses door thickness, hinge backset and the clearance required past the obstruction (Hager commercial-hinge catalog). Parliament and projection hinges are likewise selected by the projection needed to clear trim or a reveal, not by doorway width alone (Conquest technical guide).
A 3/4-inch offset pivot belongs to a separate hardware family. For example, ABH’s archived documentation for its 0195 set specifies handed ordering and mortised top and bottom components at the header, jamb and door (ABH 0195 specifications). A pivot set is not a drop-in substitute for butt hinges.
Measure the Clear Opening at 90 Degrees
If the purpose is to gain usable passage width, do not begin with the nominal door width. The relevant measurement is the clear opening with the door open.
- Open the door to 90 degrees.
- Measure horizontally from the face of the open door to the opposite stop.
- Record the current clear width and the width required.
- Check whether the door can travel beyond 90 degrees without the lever, closer, door edge or face striking the wall or trim.
Where ADA Standards §404.2.3 applies, an opening must provide 32 inches (815 mm) minimum clear width, measured between the door face and stop with the door at 90 degrees. An opening more than 24 inches (610 mm) deep must provide 36 inches (915 mm) minimum. The same section also limits projections into the required width (U.S. Access Board, ADA Standards §404.2.3).
A product described as an “ADA hinge” does not by itself make an opening compliant. Clear width, maneuvering clearance, threshold, operating hardware and opening force remain separate checks. Applicability also depends on the opening and governing requirements.
Do not assume that the hinge’s stated offset equals the gain in passage width. Confirm the open-door position on the manufacturer’s dimensioned template. Ives says its 5BB1SC and 5BB1BSC hinges clear the opening at 92 degrees (Ives product sheet). Hager’s BB1261 still projects 3/32 inch (2 mm) past the jamb stop at 90 degrees, while its template says the door clears at 95 degrees (Hager BB1261). The result is product-specific.
If the door cannot safely open to the angle at which the selected hinge clears the stop, its nominal offset will not produce the expected usable width. Check handles, wall stops, closers, holders, adjacent doors and trim before relying on the published clearance angle.
Record the Existing Hinge Preparation
Support the door before removing a hinge. Record the dimensions and construction details needed to determine whether a replacement will fit:
- Hinge height: Measure parallel to the pin.
- Mounting type: Identify full mortise, half mortise, full surface or another arrangement.
- Leaf thickness: Measure with calipers where possible. A different gauge can change the door gap.
- Screw pattern: Record the hole count and center-to-center positions. Matching height does not ensure matching holes.
- Corner shape: Note square, 1/4-inch radius, 5/8-inch radius or another profile.
- Door thickness and edge: Include whether the hinge edge is square or beveled.
- Handing: Use the selected manufacturer’s handing diagram. Some swing-clear hinges are reversible; some pivots must be ordered LH or RH.
- Door size, weight and use: Record width, height, approximate weight, traffic level and the current number of hinges.
- Existing preparation: Photograph the door and frame mortises, reinforcement and screw locations with a ruler in view.
Hager’s swing-clear range shows why hinge height alone is insufficient. Its chart lists 3-1/2-, 4-, 4-1/2- and 5-inch models across different gauges, fasteners, bearing types, door-edge profiles, weights and mounting methods (Hager swing-clear sizing chart). “4-1/2-inch offset hinge” is therefore not a complete specification.
Use the flat-open measurement method in How to Measure Door Hinges for a Drop-In Replacement, then add the offset geometry, required projection and opening-angle checks.
Wide-Throw Hinges Require Obstruction Measurements
For a wide-throw, parliament or projection hinge, measure the obstruction that the open door must pass. This may include casing, a wall reveal or trim beside the frame.
Record the door thickness, hinge backset and the required clearance past the obstruction. Those dimensions determine how far the hinge pin must project from its conventional position. Doorway clear width alone does not establish the required open hinge width.
Also check the path of the door face and operating hardware. A hinge may move the slab past the casing while the lever, pull or closer arm still collides with the wall or trim.
Check the Entire Door Assembly Before Ordering
Write the proposed specification in this order so that the supplier or manufacturer can review the application:
- hinge family and mounting type;
- required clear opening or obstruction depth;
- door and frame material;
- hinge height, gauge, corners and screw pattern;
- square or beveled door edge;
- handing, if required;
- door dimensions, weight and traffic level;
- bearing type, material and finish;
- compatibility with the closer, stop, holder, seal and latch.
Swing-clear geometry changes the pivot point. Hager’s installation template directs users to consult the closer, holder or overhead-device manufacturer for application details (Hager template T-372). Confirm that the closer can operate through the required arc and that its arm, track or body will not bind.
Also confirm that the latch enters the strike after the door position changes. Check that the shifted door does not crush weatherstripping, drag against the frame or strike adjacent trim.
Use a compatible set of supporting hinges. Do not mix standard and swing-clear butt hinges unless the manufacturer expressly allows the combination and their pivot axes align. Misaligned axes can cause binding and transfer load into the hinge fasteners, door or frame.
For a fire-rated or egress opening, do not enlarge mortises, drill the labeled door or frame, or substitute fasteners based on matching dimensions alone. Confirm the complete assembly’s listing, manufacturer instructions and applicable local requirements. A heavy door or a conversion from butt hinges to pivots also warrants review by a qualified door-hardware professional.