
Where Hinges Go—and When Existing Mortises Decide
Use customary spacing only to start a new basic layout; for a replacement slab, copy each mortise from one clearly named reference point.
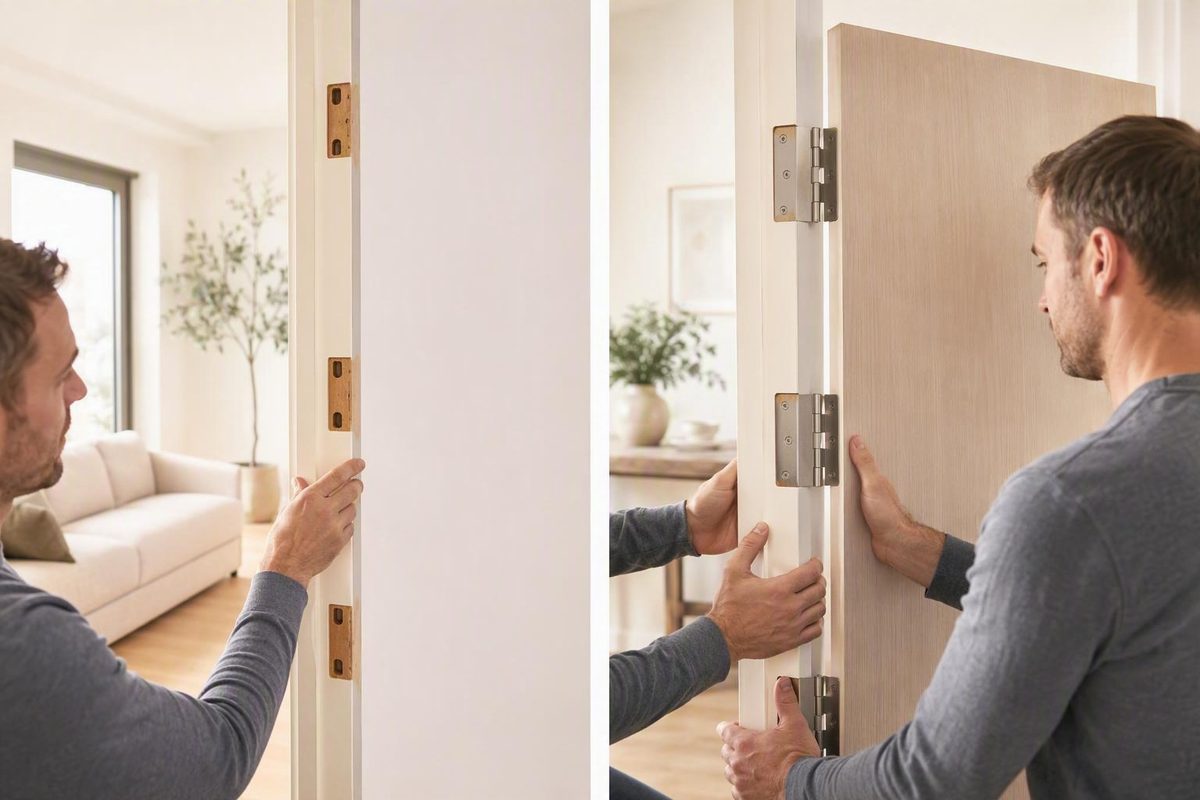
Door hinge placement depends on the job. For a genuinely new basic door, current product instructions and customary spacing can provide a starting layout. For a replacement slab, copy every existing mortise using one clearly named reference convention. For a prepared steel opening, field-measure the frame and confirm the current manufacturer template. For a labeled or specialty assembly, stop using generic dimensions and follow its listing, manufacturer instructions, and applicable requirements.
Quick answer: choose the workflow before choosing dimensions
There is no hinge-placement formula that fits every door. First identify which of these four workflows applies:
| Job type | What controls hinge placement | What to do |
|---|---|---|
| New basic door | Current product instructions, then customary spacing as a starting point | Establish upper and lower positions, then distribute intermediate hinges as instructed |
| Replacement slab | Existing door and frame mortises | Measure and copy every mortise from a defined reference point |
| Prepared steel opening | Existing frame preparations and current manufacturer information | Field-measure every cutout and confirm the current manufacturer template |
| Labeled or specialty opening | Assembly listing and applicable requirements | Obtain assembly-specific instructions before altering or ordering anything |
In replacement work, the existing mortises normally control even when their positions do not match a familiar rule of thumb. Moving a hinge to make the new slab look “standard” will not move the corresponding preparation in the jamb.
Never cut or order from a number whose endpoints are unclear. “Top hinge: 5 inches” is incomplete. It could mean frame head to hinge top, slab top to hinge top, slab top to hinge centerline, or another convention. Those measurements are not interchangeable.
Customary placement for a new basic door
When there are no existing mortises or manufacturer-prepared locations to match, one commercial hinge manufacturer describes this typical starting layout:
- About 5 inches from the top of the frame to the top of the upper hinge
- About 10 inches from the bottom of the frame to the bottom of the lower hinge
- A third hinge halfway between the upper and lower hinges
- Additional hinges distributed evenly between the outer hinges
These are frame-based endpoints, not slab-top measurements. Door height, width, thickness, weight, use, and application can affect hinge selection, and the selected hinges must have suitable capacity. The McKinney commercial hinge guidance should therefore be treated as a starting point, not a universal template.
When laying out intermediate hinges, calculate the spacing from matching points. Centerline-to-centerline spacing is unambiguous. Top-edge-to-top-edge spacing can also work when all hinges are the same height. Do not average the top edge of one hinge against the bottom edge of another.
Architectural woodworking discussions also mention a “7 inches from the top and 11 inches from the bottom” tradition. The underlying trade discussion does not define the frame-or-slab datum and hinge edge consistently enough for those figures to serve as machining dimensions.
| Basis | Reported placement | Appropriate use |
|---|---|---|
| Customary starting point | About 5 inches from frame head to upper-hinge top; about 10 inches from frame bottom to lower-hinge bottom | A new basic layout, subject to product instructions |
| Traditional trade convention | “7 inches from the top and 11 inches from the bottom,” with incomplete endpoint definitions | Historical context only; not a cutting dimension |
| Existing or manufacturer-prepared layout | Whatever the measured mortises or current template require | Replacement slabs and prepared openings |
Do not turn any of these traditions into a universal hinge-count formula. A tall, wide, heavy, thick, high-use, or unusually constructed door may need a different hinge type, quantity, or layout. Equal spacing makes a layout orderly; it does not establish that the hinges can carry the door.
How to measure hinge locations for a replacement slab
For a replacement slab, use a top-to-top convention consistently:
- Identify the existing slab’s true top edge.
- Measure from the top of the slab to the top of the first hinge.
- Repeat from that same slab-top reference point to every other hinge.
- Record the units and write the reference convention beside the measurements.
- Use the precision and dimension format requested by the selected manufacturer or supplier.
Use this worksheet:
| Field | Measurement |
|---|---|
| Units | Inches / millimetres: ______ |
| H1 | Slab top to top of first hinge: ______ |
| H2 | Slab top to top of second hinge: ______ |
| H3 | Slab top to top of third hinge: ______ |
| H4 | Slab top to top of fourth hinge, if present: ______ |
Do not send a supplier an unexplained list such as “7, 37, 67.” Label it clearly: all hinge locations measured from slab top to hinge top; units: ______.
Also record:
- Slab height and width
- Door thickness
- Hinge count
- Hinge height
- Hinge open width
- Leaf thickness
- Hinge backset
- Square or radiused corners
- Existing mortise and preparation details
Follow the selected manufacturer’s instructions when measuring slab height. Masonite, for example, tells customers measuring certain replacement slabs not to include the bottom sweep. It also requests separate top-of-door to top-of-hinge dimensions and a fourth location for applicable 96-inch replacement doors. These are Masonite-specific ordering instructions, not proof that every 96-inch door requires four hinges.
Hinge height is measured along the pin. Open width is measured across both leaves with a butt hinge opened flat. Corner shape must match the mortise as well. The Door Folks’ guide to measuring a butt hinge explains how to record those dimensions and match the corner radius before ordering a drop-in replacement.
The top-to-top method prevents a common reference-point error, but it does not establish complete compatibility. Two hinges can share the same vertical position yet differ in open width, leaf thickness, backset, corner shape, screw pattern, or preparation.
How to measure an existing steel frame
Do not use a generic steel-door spacing chart as a machining template for retrofit work. The Steel Door Institute says its published standard spacings must not be relied upon when fitting doors or frames to an existing installation. Hinge and strike locations require field verification, and manufacturers may revise their preparations over time. Dimensions should therefore be confirmed with the individual manufacturer before fabrication (SDI 129-24).
For an existing steel frame, measure:
From the frame head’s door-rabbet surface to the top of each hinge cutout.
Keep that convention separate from slab top to hinge top. The replacement door’s preparations must coincide with the frame preparations so that the slab occupies the intended position and retains the required operating clearances.
Record more than the distance between hinges. Steel Door Institute replacement-door guidance calls for documenting hinge size, leaf thickness, backset, and each vertical location. It also warns that an improperly installed, out-of-square, or unlevel frame can impair operation and may require adjustment or replacement (SDI 135-26).
Nominally similar steel doors can have different manufacturer-specific hinge locations. An April 2000 comparison chart, for example, uses several reference systems, including inside frame head to hinge top, door top to hinge top, and door top to hinge center. Because the chart is dated and parts of its reproduced text are unclear, use the legacy hinge-location chart only to illustrate variation or help identify an opening—not to machine a door.
When possible:
- Identify the frame or door manufacturer from labels, stamps, paperwork, or recognizable preparations.
- Field-measure every hinge cutout from the same named datum.
- Photograph the complete opening and each preparation.
- Confirm the dimensions against current manufacturer information before fabrication.
Check the frame itself before assuming an unexpected number is a measuring mistake. Frame condition can affect how a correctly prepared replacement slab fits and operates.
Pre-order and pre-cut checklist
Print or copy this checklist for the opening:
- [ ] Job type: new layout, replacement slab, prepared steel opening, or labeled/specialty assembly
- [ ] Units: inches or millimetres
- [ ] Measurement convention: both endpoints named in writing
- [ ] Required precision or supplier format confirmed
- [ ] Door height
- [ ] Door width
- [ ] Door thickness
- [ ] Hinge count
- [ ] H1 vertical location
- [ ] H2 vertical location
- [ ] H3 vertical location
- [ ] H4 vertical location, if present
- [ ] Hinge height
- [ ] Hinge open width
- [ ] Leaf thickness
- [ ] Hinge backset
- [ ] Corner configuration: square or measured radius
- [ ] Existing preparation details
- [ ] Visible certification labels on door and frame
- [ ] Frame checked for square and level
- [ ] Door and frame hinge preparations correspond
- [ ] Hinge orientation confirmed
- [ ] Current manufacturer instructions checked
Write “slab top to hinge top” or “frame-head rabbet to cutout top” beside every group of vertical measurements. Hinge-top, hinge-bottom, and centerline dimensions cannot be substituted for one another without a clearly documented conversion. Do not apply a universal conversion between frame and slab measurements.
Before cutting, place the selected hinge in its intended orientation and confirm that the door leaf corresponds with the frame leaf. The leaves should sit flush in their mortises. There is no universal mortise depth: it depends on the selected hinge, its leaf thickness, and the existing or specified preparation.
If the vertical positions appear correct but the door still will not align, inspect the complete fit. Vertical agreement cannot compensate for the wrong hinge size, leaf thickness, backset, corner configuration, orientation, or frame condition.
Supplier handoff
Send:
- The annotated measurement worksheet, including named endpoints and units
- Clear photos of the door, frame, and each hinge preparation
- Photos of all door and frame labels, where present
- Every dimension requested by the selected manufacturer or supplier
When generic hinge placement guidance should stop
Generic spacing is not enough for heavy, wide, high-use, specialty, electrified, institutional, or manufacturer-prepared doors. Hinge selection and layout may depend on door construction, hardware function, load, wiring, reinforcement, listing, or complete assembly requirements.
For a fire-rated opening, locate and record the labels on both the door and frame before altering hinges or preparations. Matching the hinge dimensions does not establish fire-door compliance because the door, frame, hardware, clearances, closing action, and latching operation function as an assembly.
Fire doors must remain capable of opening, closing, and latching, and they must not be blocked or wedged open. NFPA guidance states that inspection and testing are required after initial installation and at least annually thereafter, performed by a qualified person acceptable to the authority having jurisdiction. Labels, components, clearances, damage, and operational closing and latching are among the matters evaluated during inspection (NFPA fire-door guidance).
For a labeled or otherwise regulated opening, consult the applicable listing, current manufacturer instructions, local code, and authority having jurisdiction. Generic guidance cannot supply universally valid hinge quantities, fasteners, or machining dimensions for these assemblies.
The practical rule is measurement first: use customary dimensions only to begin a genuinely new basic layout. For replacement work, copy the actual preparations using explicitly named reference points. Verify the complete hinge and door specification before ordering or cutting, and let current manufacturer and assembly requirements control prepared, heavy, specialty, or labeled openings.
Does every 96-inch door require four hinges?
No. Masonite asks for a fourth hinge location on applicable 96-inch replacement doors, but that is a manufacturer-specific ordering instruction. Hinge quantity depends on the selected door, hinge, construction, use, and applicable assembly requirements. Do not infer a universal count from door height alone.
Where can I look for evidence that a door is fire-rated?
Inspect both the door and frame for certification labels, then photograph and record the visible information before any alteration. Also check the manufacturer’s documentation, building records, and the applicable listing. If the opening’s status or permitted work is uncertain, consult the manufacturer and the local authority having jurisdiction. A matching hinge or mortise does not by itself prove that the complete assembly is fire-rated.